

3D with Shade 8 Standard:
adding a camera
Here's what we want to accomplish in this first tutorial: placing a car from the model collection into the scene and spinning it around. Let's get started.
- step1 - getting started
- step2 - first rendering
- step3 - adding a camera
- step4 - keyframing a motion path for the camera animation
| Affordable 2D + 3D Software Animation Tools at lowest prices! Poser - Anime Studio - Carrara - Manga Studio - Bryce and much more from Purplus |
Powerful
3D & CAD Illustrations with Quicktime VR, Includes large model
collection of vehicles Shade 8 standard edition Regular price: $99.95 |
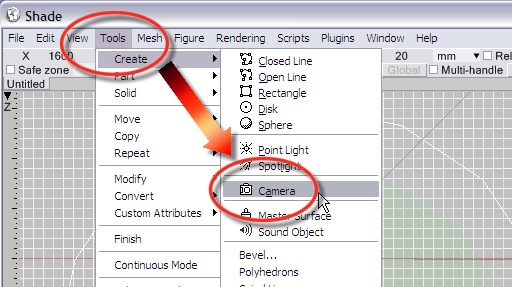
Adding a camera is a bit like creating a new object to add to the scene. Select
menu: Tools > Create > Camera
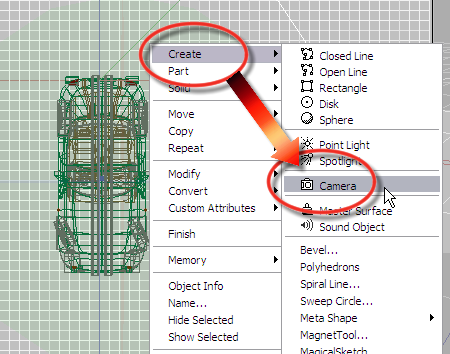
There is an alternate way, directly from one of the views: Right-click in the view and find the Create item in the context menu:
| Make
Flash animations in seconds without scripting MotionArtist 4  Regular price: $49.95 Sale price: $15.95 |
The method to position and aim this new camera as you're inserting is involves a click-and-drag placement:
1. click (and hold the button) to position the camera (eye position), start dragging
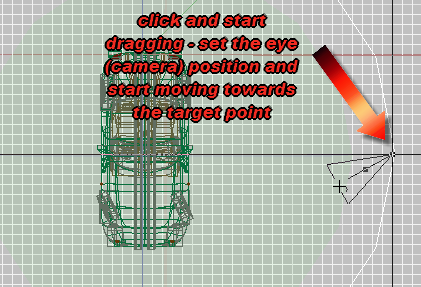
2. drag the other end of the camera to set the target point

3. release the button when done
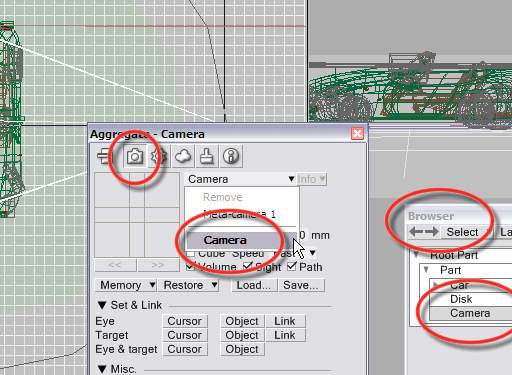
Now that a new camera has been added to the scene, it will show in the list of objects in the Browser, and you can select it there. You will also see that it can be selected in the Camera window.
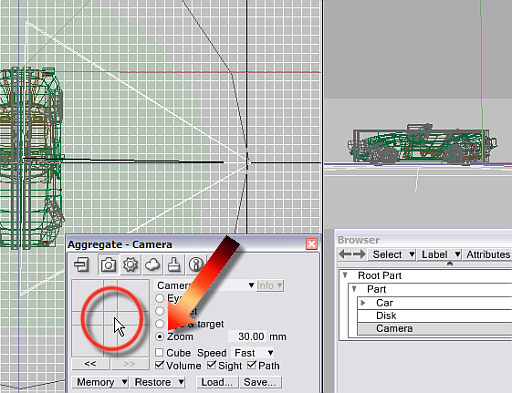
Adjusting the Camera
You may want to adjust the zoom level of the camera lens. Select the camera, select the Zoom parameter and either enter the desired focal length (e.g. 30 mm) for a wire angle, or you can interactively adjust the zoom valueby dragging the cursor in the cross-pad area:
Rendering the view from the camera
Remember that you'll want to either use Ctrl-Shift-R to render the whole scene through the current camera, or select the Root part in the browser prior to normal rendering with Ctrl-R
Fine-tuning the Camera position: Camera height over the ground
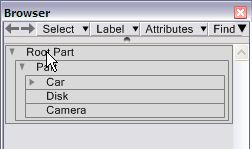
This may be a good time to re-adjust the view layout. It will be useful to get a good look at the side or front views (bottom views). These will show how high above the ground the camera is standing. Grab and drag the cross-spot between the 4 views and adjust the views so you can see plenty of the two bottom views.
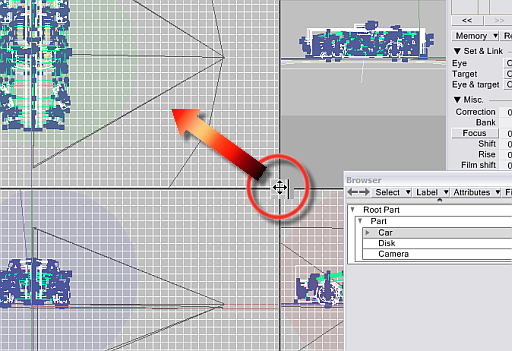
WHen you select the Camera object in the browser, you will see three hotspots on the camera:
- the current eye position of the camera
- the target point on the other end
- a hotspot in the middle between the eye and target
The middle point can be used to move the camera altogether, wherease moving the eye will keep the target at the same point and vice-versa.
We will use this next, to reposition the camera eye point along a path around the car. The camera's target will remain pointed at the center of the car.
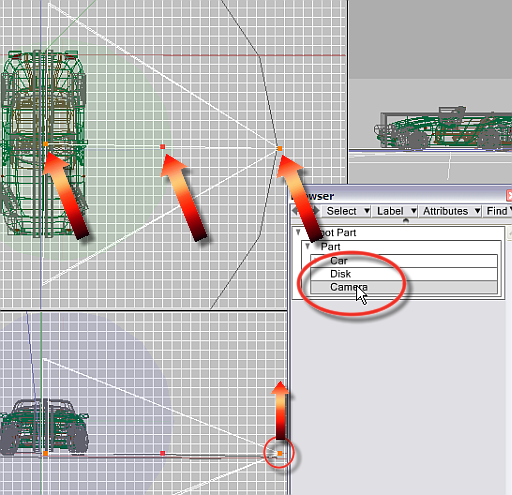
Before you start with that, you may want to adjust the height of the eye above the ground, to better mimic the eye position of a human eye hen the observer is standing on the ground. This is easily done in the 'Front' view (lower left quadrant of 4 views) where you can easily grab and drag the red marker eye point upwards as needed.
Finding the hotspots
Note that when you place the cursor near the desired hotspot, the cursor changes from a small crosshair to one which adds a small black dot. That indicates that you're on spot, right on the mark, close enough to the hotspot to grab it.


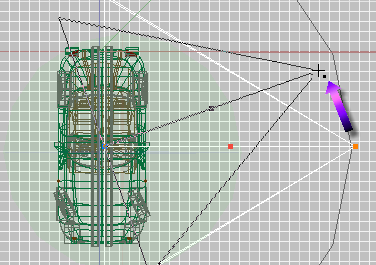
Click and drag the eye point in this way to reposition it without changing the target point of the camera, as seen here in the top-down view:
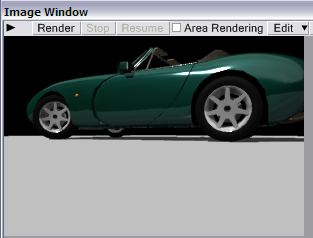
Here's a rendering created from that new vantage point. Note that the camera is still very low, almost on the ground floor (the disk object appearing grey)
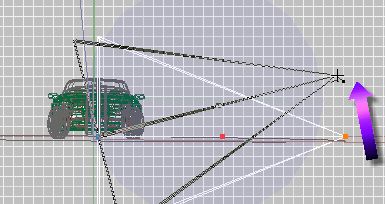
You can now use the steps described here to raise the eye point as shown in this front view in the lower left views quadrant:
Next step - keyframing a motion path for the camera animation