What is Affinity Designer?
Affinity Designer is great design and illustration software from Serif, a program available here:
https://affinity.serif.com
If you are an Illustrator, a graphic Designer, or have a creative mind
of many sorts, you should have a look at Affinity Designer.
It is one of several awesome programs made by Serif, and we particularly
love it for its capability to export to a variety of file formats.
For example, if you create a heightmap with erosion and sediments in PD
Howler's 3D Designer, you may want to save it out as 16-bit Tiff, even
if it only started with 8-bit depth. Affinity can do that, exporting to
16-bit grey in Tiff and Png formats, to name a few.
Affinity Designer is a great companion to Dogwaffle's PD Howler or PD
Artist, and we strongly recommend it. It is very affordably priced, in
about the same range as PD Howler.
If you're more into Photography, you may want to have a look at their Affinity Photo line.
In the tutorial shown here, we'll see how to take an existing callout
from an emf file (extended Microsoft Metafile format) as found in Howler
11 or Artist 11. You can make a lot of changes to it or even create
your very own callouts, and then export the new callout straight into
the folder where Howler will see it and let you use it.
The Tutorial
In this tutorial we want to take an existing callout from Dogwaffle,
and modify it, for example to make it contain a duplicate of itself and
give it different coloring.
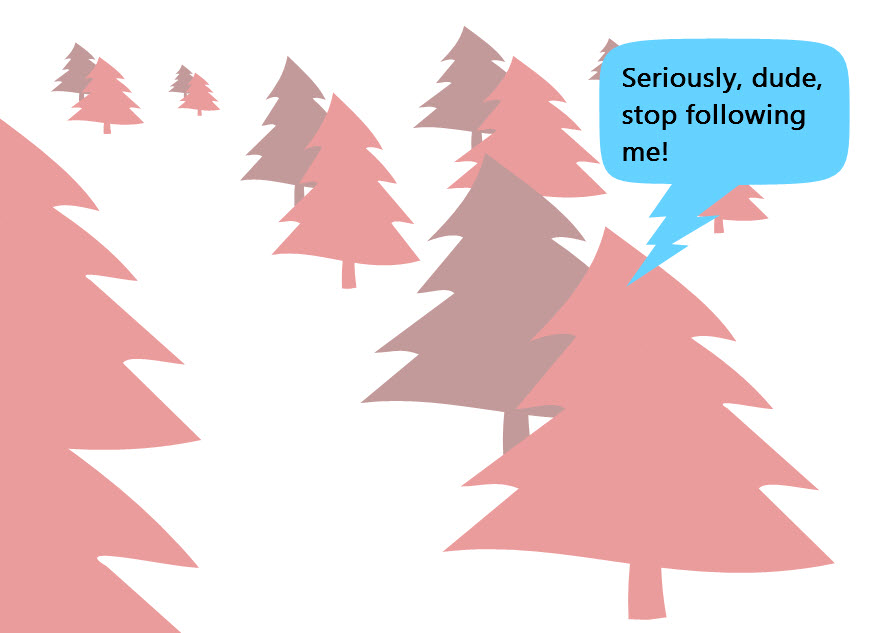
We could for example take one of the tree shapes and make it so that the new callout contains two trees.
So, essentially, a tree that could shadow another...
If you didn't know, Howler 11 (and Artist 11) now have a new Callout
tool. A callout is a graphic object that usually has the shape of a
bubble, into which you'll add some short text or dialog. It comes handy
in cartoons, comics, and many other illustrations where someone says
something, or has a thought, or makes some sound effects.

Callouts are implemented as vector objects and highly transformable
and adaptable to your image's needs. We've included a bunch of callouts
as enhanced metafile formatted files (emf). They were created with other
programs such as the free Inkscape or the draw program from OpenOffice
and similar tools. Affinity Designer is also an option, and a great one
at that. That's what we'll focus on in this tutorial.
Callouts in Dogwaffle's PD Howler 11 can be accessed below the Curve tool on the toolbar, amongst the Gradient and FX tools, near the Lens Flares and lightning.
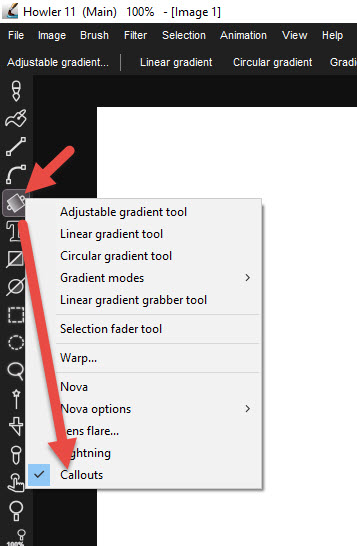
The secondary context bar then also shows the
Callouts... button after you've selected any of the gradient / FX tools. Use the scrollbar to preview the many available presets.

There are many(!) presets for various types of callouts, and you can
easily further transform them with the control handles around their
bounding box. The initial release of PD Howler 11 includes over 150
callouts! Some of them are bubbles for straight dialogs. Others are
cloudy bubbles for thoughts. ANd yet others are great for sound effects
like POW! and ZAP!, SPLAT! or HIT!. There are stars, arrows, and many
other shapes, even trees.
In the upper left corner there are also quick tools for horizontal and
vertical flipping, so you can invert the shape's orientation. And there
are many control handles where you can resize, rotate, squew and modify
it.

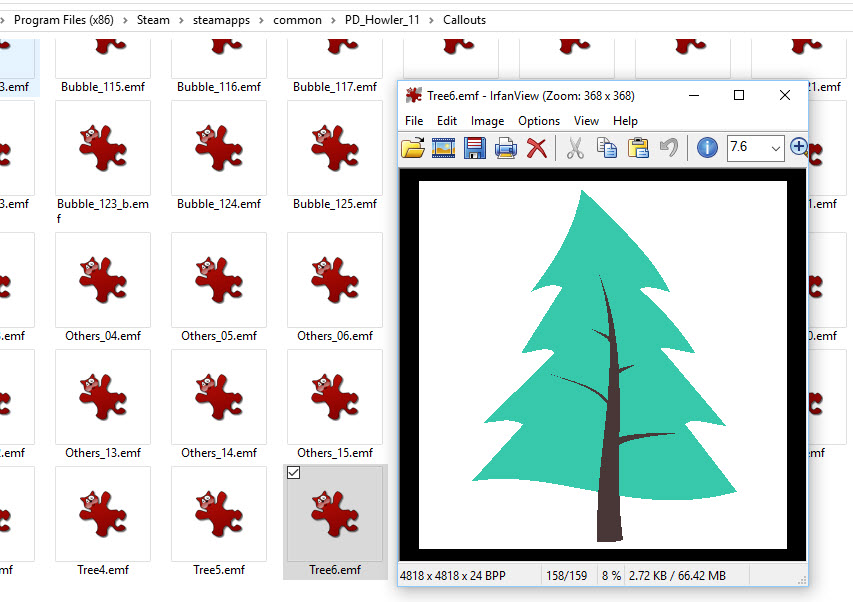
Alright, so here is one of the tree callouts, which we find near the end of the list of presets.
We'll want to find the file in the Dogwaffle installation that defines this, to load it into Affinity Designer.
To locate the file, go to the folder where your PD Artist or Howler is installed.
Below is an example from an installation with Howler 11 in Steam. (coming in May 2017).
Yours might be different, such as in C:\Program Files(x86)\Howler.
Locate the Callouts folder within your Dogwaffle installation, and open it.
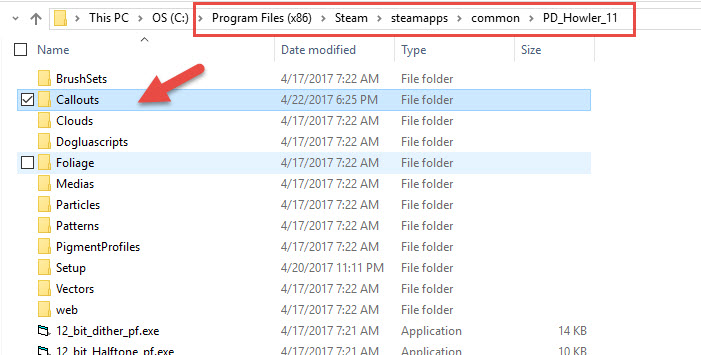
The callouts are in Enhanced Microsoft Metafile (*.emf) format
Those contain the shapes in the form of scalable vector objects.
Look for the trees. Several files start with 'Tree'.
You can preview them in an external viewer such as Irfanview.
Or just open it in Affinity Designer to see the content.
You can also open them from File > Open in Dogwaffle, since it
includes the image converter from ImageMagick, but keep in mind that it
will turn it into a raster image within Dogwaffle when you do that. Still,
you can check the specific files that way to verify which file contains
which callout. In fact, you get over 150 callouts that could easily
become the starting point of creating special brushes, such as to hold a
fancy arrow or other shapes, and you could add drop shadows, embossing
and other effects to them for even more sophistication. We'll explore some of that in another tutorial.
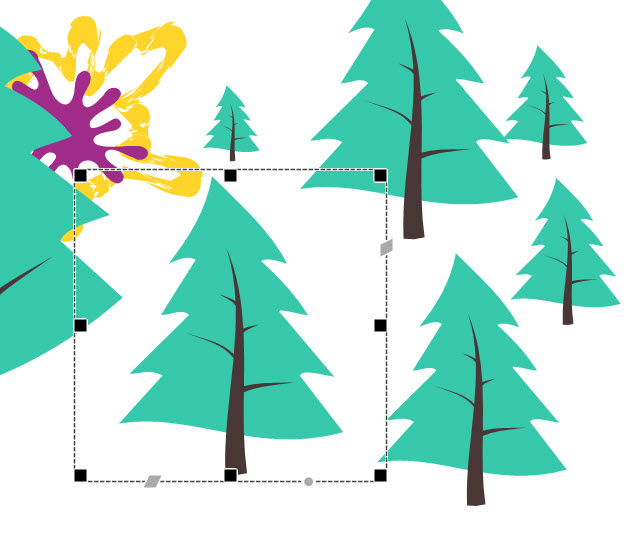
Open the desired file in
Affinity Designer. Here we chose Tree6.emf:

This tree was originally made in Inkscape, another great tool, so you
see that info in the lower left corner and it also is the layer's name
now.
The original tree contained two items of different coloring, as seen
above: green leaves (or needles) and brown trunk and branches.
The entire object is current selected .
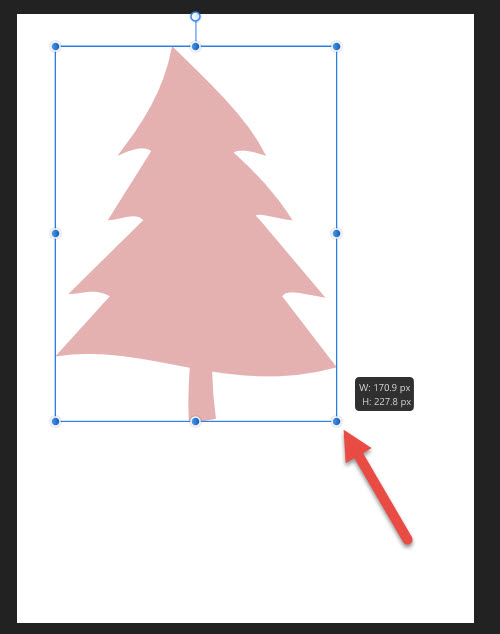
If we pick a color from the color picker, it re-colors them all the same. Perfect!

Click the tree object to select it and do your desired re-coloring. Then
also grab the corners to move and resize it. Here we move it a bit to
the upper left and make it smaller.
We'll give it a lighter tint, to make it a bit looking like it's in the far distance, way back in the fog
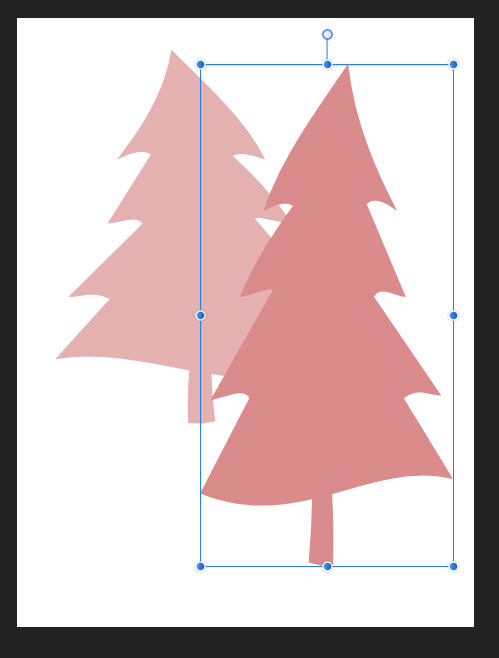
Then copy/paste it (Ctrl-C / Ctrl-V) to create a duplicate, move it
aside and grab the side handles to flip it over itself horizontally,
then move it and resize it.
Make it a little bigger.
Recolor it to a more saturated and darker tint, less foggy, appearing closer, in front of the original.
Now the 2nd tree looks like it's a little closer.
You can easily reshape it. Affinity Designer is a great tool!
Here we simply made it a little more narrow by grabbing the handles on the left or right side and resizing just horizontally.
And that's about it, we're now ready to re-export our new shape as a new emf file for use in Callouts.
Use File > Export...
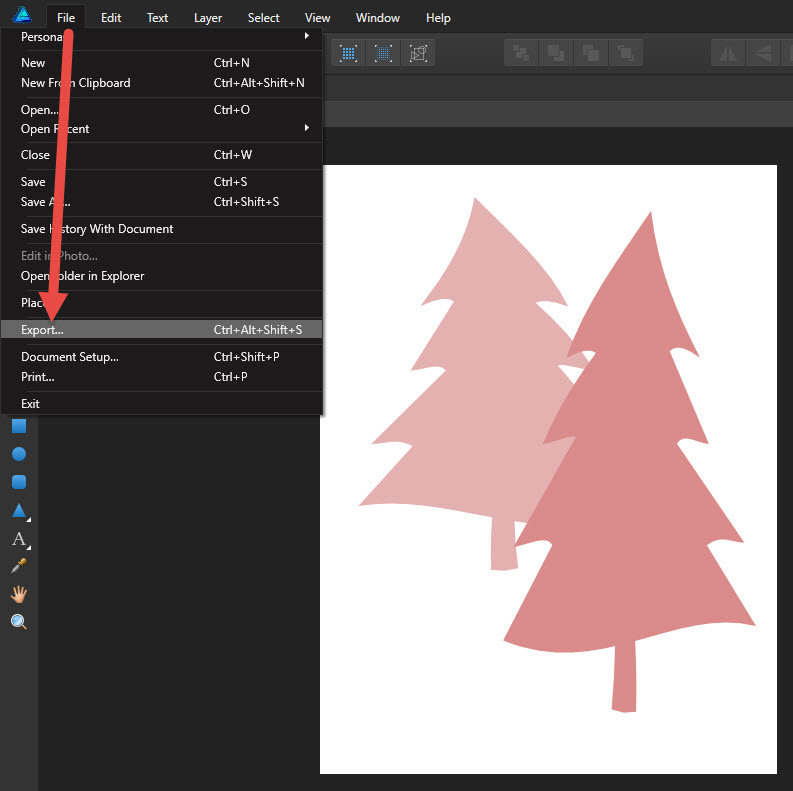
We love how the many file formats are lined up in a top row of icons. Genius!
Make sure you use Enhanced Windows Metafile as the format. There should be a preset.

However, come to think of it, this may not be ready as is.
Well give it a try, but I think you'll want the background to stay transparent.
Perhaps you'll need to check the box for
Clip Transparency:
While you're at it, you might as well create a new Template for this. Click
More...
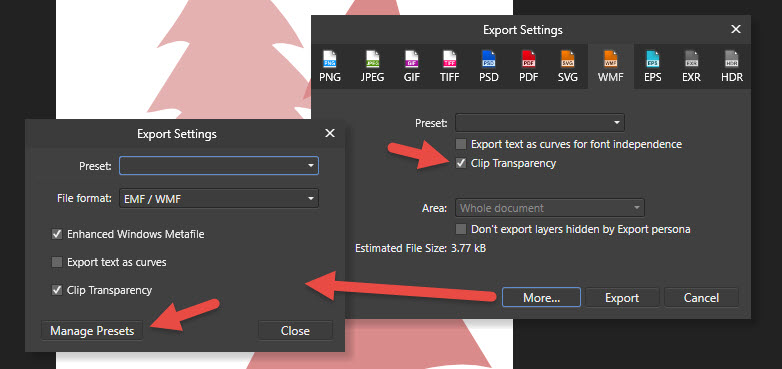
Choose the File Format that shows
EMF / WMF
check the box for
Clip Transparency
Click
Manage Presets
I created a preset named 'for Dogwaffle'. Now I have a quick way to export it with proper settings.

I could perhaps have made it more specific in the naming of this preset:
for Dogwaffle Callouts
Last step: save the file to the same folder where the other Callouts are located.

Give it a new, different name. You don't want to accidentally override the original.
And voila, here we're back in Howler 11 and the new pair of trees is in the updated list of available callouts!

Thanks for watching - time to get creative!


