SkyBlast - the Tutorial

SkyBlast - the Tutorial |
|

|
Have you ever drawn your favorite spaceship or super hero or done a 3D rendering and wanted to quickly add a supernova explosion backdrop or similar effect? Dogwaffle can do many different effects like this one. This tutorial shows how to create an image like the one shown to the left. For a larger version of this image, visit the free Wallpaper area |

|
To start we use the atmospheric sky generation
system. It is accessible from the Filter menu and Render submenu:Filter > Render > Sky... |

|
There are many options to play with in this
tool. Perhaps we will want to change the camera heading, pitch or bank,
or use a wide angle by reducing the zoom factor so we may see more of the
sky and ground. If you want to make it look like we're on Mars with red skies, change the colors too. After the basic skies are ready, let's right-click on the Line tool. |

|
There's much more to this tool then just drawing
lines. There are several tools in there which take a line/direction
as input to create a visual of something. For example, a lens flare is a series of internal lens reflections, lined up along the line you would draw in rubberband mode. The Warp tool is equally powerful and funny too when used on someone's photograph. |

|
For our tutorial, we'll use a different mode - the Nova mode. It is intended to create a light flash with a radius based on the line and centered at the starting point of the line. |

|
Before we draw it we may want to set the primary and secondary colors so we have some kind of red and something pink or blue'ish readily available. This way we'll be able to create various types of nova flares and combine their colors. We can of course change colors again further if desired. |

|
Now click on the sky, namely where you want the center of the nova, and drag to set the radius. When you let go the mouse, a nova will be rendered there. |

|
Repeat with a larger radius, centered at the
same location as the first nova. Move the mouse in a different direction so that this nova will have its stars oriented differently from the first one. |

|
We can add a few more, at different color, size
and orientation etc. Quickly, you'll get something like this. |

|
Next, we want to create that look of jumping
into hyperspace. It's done easily with a Zoom blur filter. |

|
Set the Factor and Quality, then drag the crosshair on the preview panel to position it at the center of the nova. Shortly thereafter you'll see the Zoom blur effect applied to the whole image. |

|
Finally, we may want to emphasize the effect
a little with embossing, yet another filter. Here's an example of rendering a simple 3D spaceship against such a backdrop. 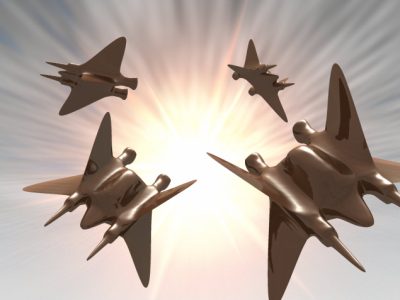
|