

| More: |
| Tutorials |
| PD Particles |
| PD Artist |
| PD Pro |
| PD Pro Tutorials |
| TheBest3D.com |
| Hi, my
name is Cristian, and I live in Romania, where I compose electronic
music. I also have learned to use a few visual tools and 3D graphic
programs, including Terragen
and Blender.
In this tutorial, I'm exploring some ways to use PD Particles to make
great foliage, and then I show how I place the pictures of that foliage
into a 3D scene of Blender, my favorite 3D program. Blender is free,
but also very powerful - a great combination when you can't affod the
other, established commercial applications. PD Particles is not
free, but almost, and I like not just the low cost of it - it just is a
really cool paint program for starving artists, and seriously also for
well established professionals who have spent so much more for other
painting tools and are still looking for something to do just that:
paint foliage. I hope that they will take the time to learn about
PD Particles. In my opinion, it is a very good tool like you don't see
too many others at that price, and it is very focused at the task, so
it should be a great companion to whatever tools you use for 2D and 3D.
I hope some day there may even be a Mac or Linux version for others to
enjoy too (you might want to try it under Wine, or Parallels). |
||||
Here's
a quick look at the finished image: (click to enlarge) I will use PD Particles to create a beautiful cartoon sky and add some vegetation in my Blender file. |
Like I said, this tutorial
will show how I use PD Particles
to add vegetation, a painted sky with clouds or other elements inside a
Blender scene. You can use PD Particles with Blender in a lot of different ways:
|
|||
| Let's
start by creating the background: blue sky and clouds Let me say that PD Particles is the best application I have found for painting clouds the way I like them. You can paint hundreds of different cloud types with so many brushes and so much control over the brush settings. I started with a 2D app called Artweaver, but you can start directly in PD Particles or your other favorite image editor like the GIMP, PS, PSP, etc... I started with a new 1024x768 document. I choose two different blue colors and used the gradient tool to obtain a clear sky with a transition of colors that shows a little bit of haze towards the bottom (horizon). Using the free Dogweaver plugin that sends the image from Artweaver straight to PD Particles, or by saving to file or the clipboard, I imported the simple sky into PD Particles. The zenith (top) colors were darker blue. I then liberally paint the clouds using the Presets -> Oils -> Large cover |
||||
|
Selecting from a Color Well PD Particles offers a variety of color presets, called color Wells. They are stored in files which end in '.wl' For my example I used the CloudySky.wl color preset file. Then, in the 'Brush setting' panel (to the right) I used various opacities with the 'Default' painting mode and a several sizes and opacities with the 'Smear' painting mode.  What I liked is that it all felt so natural when I tried this the first time, it took me very little time to learn and know what I wanted to do. |
|||
 |
You can read more about this and other techniques and learn new methods for painting clouds reading these tutorials: This time I wanted to obtain only simple white patchy clouds because it will be a cartoon composition. I saved the final image in a png format. <<< click to enlarge |
|||
 |
My intention was to create
a cartoon Blender scene with nature, some hills, a little river, a
bridge and some funny characters imported from Poser. I started modeling the terrain in Blender using the "PET" tool (proportional editing tool), setting the point of view, camera etc. <<< click to enlarge |
|||

|
Importing the Background
Image into Blender At this point I wanted to import the background, i.e. the painted image. Here are the steps to do that in Blender (you can see my setting for the Ambient Occlusion too). Click the picture to the left to see all steps in a single view.
 |
|||
 |
Then
it's time to do the modeling work in Blender and to import the Poser
characters. That is not going to be shown in this tutorial, as we'll
focus on the arts where PD Particles is used. Notice that there are a few wide rectangles in the scene on the ground, which appear to be standing on their edges. Those are the planes (billboards rectangles) to be textured with pictures containing foliage with alphas and will be filled with additional PD Particles vegetation. That's really where PD Particles shines! <<< click to enlarge |
|||
 click to enlarge 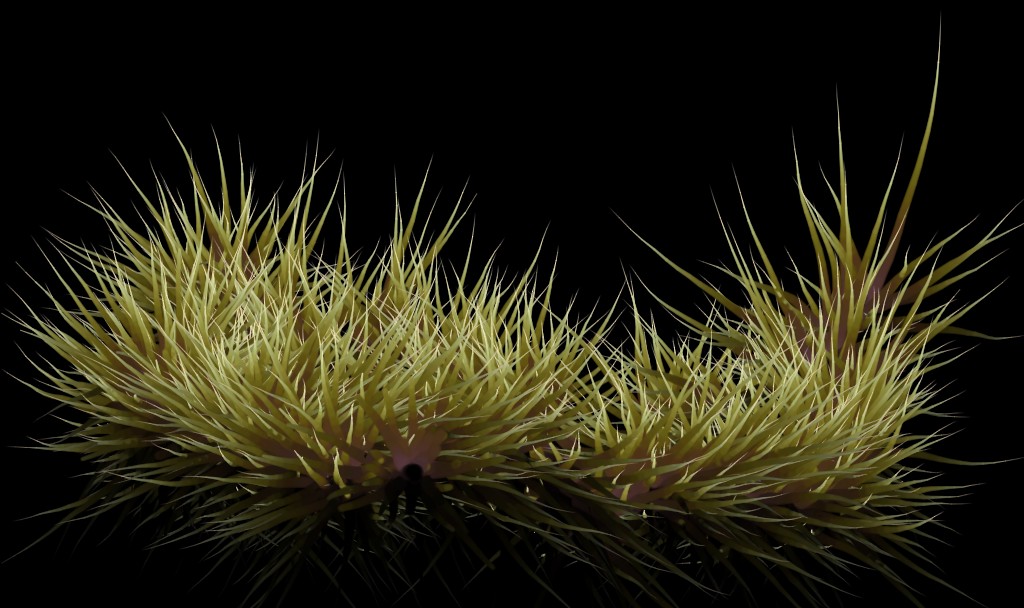  |
Painting vegetation This is truly the strong point of PD Particles. We can paint a lot of different vegetation, save it in an image file with an alpha channel (png or tga formats are the best IMHO - PD Particles 'likes' Targa and calls it 'Default Targa" but also supports other formats). Import it in Blender (or other 3D app) like alpha planes or using composite Nodes or Render Layers. I will use the alpha planes but for all who want to use another method, here are some useful links: I started painting a bush on a black background. To obtain a black background, simply go in the Filter menu -> Color -> Negative command. (if you start from a white background) or right-click on the Erase tool (the big 'X' icon) I choose one of the huge number of Presets available in PD Particles and in the right panel with the particles properties I adjusted the maximum number, mass, gravity, velocities, life, splits, size, random factor etc. Customizing all this options you can obtain thousands of different plants from this and other planets. Then I exported my bush in my default 2D app, Paint Shop Pro 7. A very good and detailed tutorial to do this is here: Using PD Particles with Paint Shop Pro These are my two bushes, captured from Paint Shop Pro. They are ready to be saved in png image file with an alpha channel. Don't forget to set the black part to be transpared.
Color-keying to black in
order to determine the transparent parts will work ok as long as no
parts in the foliage is black. Since you may likely use the 'Shading'
option in PD Particles, it is likely however that the plants growing
down will appear black or dark enough for it to be partly transparent.
In most cases it would be best to use the styles with alpha-on-the-fly.
|
|||
 |
Applying the texture
onto a plane
|
|||
 |
||||
Click on the space with 'Tex' and the one below to add another texture. Set the Texture Type to Image and Load the image. Click 'UseAlpha' and 'Clip'. The preview on the left will show the texture against a checkerboard, indicating that it has found and is using transparency masks from the alpha channel. If you mask appears inverted, click 'NegAlp' as well to use its negative, i.e. invert alpha.  |
||||
Now we go back to the shader and indicate how both textures will be used. They are of the same picture image file but will be used for color and alpha in one case and for highlights in the other. Click the shader button next to the texture button (red sphere)
This sets the main color
aspect and uses the transparency mask too. For many this might be
enough, if you use just this one and only texture on the shader.
 |
||||
With the second texture, we start very similarly. The first few tabs show the same values. The last tab, 'Map To', is different: Instead of using color and alpha, we use Nor (normals, i.e. bumpmapping) and Spec (specular). Note also that the 'Nor' and 'Var' sliders are noth at 1.0 This may add some nice specular highlights as well as bring the foliage out a little bit more into a 3D look, and appear less flat.  |
||||
 click to enlarge |
To summarize this
technique: On the Blender Artists forum you'll find an excellent tutorial written by Gabio about the steps to set an "alpha plane". Here are the main steps:
|
|||
|
Finally, You can see in
the final render how the painted bushes, foliage and grass looks
now like real 3D objects, with some bumpmapped depth and casting
shadows. Another interesting idea is the possibility to have a large number of plants (for example a forest), assigning the alpha planes to a mesh with Blender particles. Every particle will have an image with color and an alpha plane. |
|||
|
We have a lot of other
possibilities to improve our 3D/2D images using PD Particles. For
example we can adjust the colors with the Filter menu to give
different tones to various parts of the image, or we can throw a color
gradient at it for like effects. or, we can of course improve the
rendered image with a painting postwork. Cristian Mihaescu (aka criss) visit my art site: criss digital art October, 2006 |
|||


- back to part 1 - this is part 2 - more Blender Resources