New
v1.5
Fast
3D sketching, colormap, bumpmap and displacement map painting and
digital & sculpting:
Curvy 3D
the fun & intuitive way to
sculpt!

...it's not modeling, it's better:
It's
liberal sculpting!
Great for Fantasy Art, Concept Art & 3D Design, making 3D props, ...
Special discount coupons available for users of Project Dogwaffle! (ask
us)
|
Digital
Painting has never been
so much fun: Learn to
paint with Particle Brushes!

PD
Particles - $19
A fun companion for your
digital
photo image editor!
powered
by Project
Dogwaffle

|
Getting
started with Digital
Art on a tight budget?

PD
Artist - only $39
Draw,
Sketch, Animate & Paint
powered
by Project
Dogwaffle
|
How
to run
Project
Dogwaffle
on a Mac:

parallels desktop for Mac


redefining the meaning
of
window-shopping on a Mac
|
|
Here's another look
at using the tool from the Brush menu: Make Seamless.
Let's say we start with a picture loaded from an image file. Perhaps
another sky&clouds photo:
|
 |
We could have loaded the image into the brush drectly, as a custom
brush. Or, you can pick it all up: the entire image is selected by
default, so use:
menu: Brush > Use
selected as brush
|

As soon as you have an
image loaded as the custom brush, you can use the tool to make it into
a seamless brush.
menu:
Brush > Make
seamless...
|
Note that you could
use that even if the desired image is not yet the one in the custom
brush: If the desithed image is in the main buffer, check the
option 'Use buffer'
|

The display immediately shows the preview of the resulting seamless
image.
|
 You could increase the Trim x
& Trim y slider values for bigger overlap fading segments. You could increase the Trim x
& Trim y slider values for bigger overlap fading segments.
By default, the resulting image will have trimmed the overlapping parts
away, resulting in a smaller new image in the brush.
If you don't want the new seamless image to shrink in size, check the
option: Keep original size
|

The custom brush will be updated when you click OK. In additional,
Dogwaffle asks if you also want to replace the main buffer's image with
the new, seamless texture image.
|

If the original image was much larger than the screen can fit, chances
are it still is. Use
Fit the image into the window
(or function ey F4) to see the entire image.
|
|

You might want to expand the dynamic range of the image. That way
you'll get better color range utilization, reducing the washed out
apearance of some images after blending to make them seamless.
Look for
Expand dynamic range
in the Image menu (formerly Buffer menu)
|
Adding
Lens Flares
 Right-click the linear tool. It's next to the Text tool in version 4.
It was part of the Line tool in v3 and earlier versions.
Select the new Lens
flare.... tool
|
Select a preset or fiddle with the thousands of parameters to adjust
the flares to your liking
|
Before applying the lens flares: if the background sky image is
farly bright, it might be a bit too bright for you to see the lens
flares. Better use the Value filter to adjust and reduce the brightness
a little:
menu: Filter >
Adjust > Value...

|
Here's a much darker version of the sky:
|

And, if the image came from a high-resolution digital camera, it might
be much larger than what you want if you intend to use it in a web
page. Use the resample tool in the Image menu.
|

check 'Constrain' to keep the same aspect ratio...
|

...and end the new desired width.
|
ANother thing you should probably use is a blur filter if you plan on
using the image as a background wallpaper. This helps in identifying
your many icons on the desktop as they stay crisp and in focus while
the background image is off focus and blurred and doesn't distract from
the icons.
Then apply the lens flare.
 |
|
|
|
|
|
dogwaffle/tuts/2_1tutes/index.html
into 3D: draw
a shape, and see it
automatically turn it into 3D
Archipelis
Designer
cool
tool for rapid 3D model creation and prototyping from images
|
Inventory Blowout
Sale:

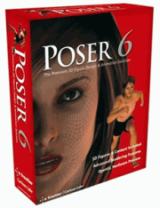
Poser 6 (boxed!) at
lowest prices:
for MacOs
or Windows
|
|


