

more tutes |
| PD
Pro tutorials |
| PD
Artist tutorials |
| Dogwaffle tutorials |
| PD Particles |
| Draw more |
||||||||||||
|
||||||||||||
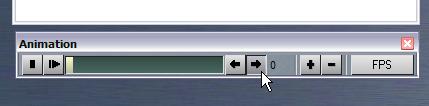 |
Now
advance to the next frame in the animation. Use the Animation toolbar,
advance to frame #1 (the first frame is #0). Or use the Left/Right
arrow keys on he keyboard to scrub through the frames. |
|||||||||||
 |
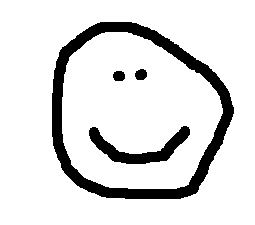
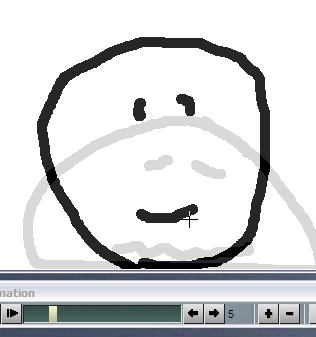
When
you're on frame #1, you'll still see the frame image which is currently
in the Swap buffer, since layer mixing (or swap mixxing to be precise)
is enabled in tracing mode. It is a light grey, less intense than the
full original. You can use this as a visual reference, a guide so you know where to draw the next parts. |
|||||||||||
 |
For
example, draw the face a little lower. Gravity is pulling it down for a
freefall. |
|||||||||||
 |
Next,
reeat the steps: ....Copy Main image to Swap buffer (J) |
|||||||||||
 |
....advance
to the next frame (#2, the third frame in the animation) |
|||||||||||
 |
...
draw an image, again a little lower, perhaps showing a bigger vertical
distance as it's accelerating. and keep going this way a few frames, copying the newly created image into the swap buffer, and advancing to the next frame, and so on. |
|||||||||||
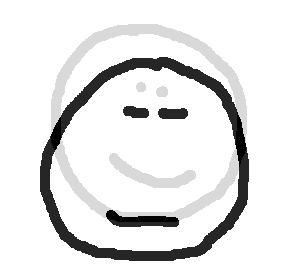 |
eventually
the happy face is going to reach the bottom . Start drawing the face as a flattening potato. |
|||||||||||
 |
At
the very bottom, make it clear that it is squashing flat. |
|||||||||||
 |
next
frame: start bouncing back. We're now on frame #5 |
|||||||||||
 |
Things
are looking up, let's put a smile on that face again. When we reach near the top, decide if you want gravity to bring it to a screetching halt or let it hit the top. When you're near or at the last frame, quickly go to the first frame and copy that into the Swap buffer again, and scrub to the last frame so you know where to draw it close to the first so it will appear to loop seamlessly. |
|||||||||||
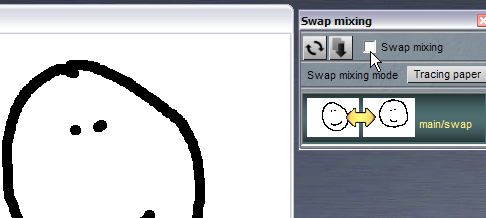 |
When
you're done drawing the frames and you don't need the reference image
in the background from the swap buffer, uncheck the Swap mixing
checkbox, or click the thumbnail in the upper right of the Tools pael
again to get rid of the orange trangle in it. |
|||||||||||
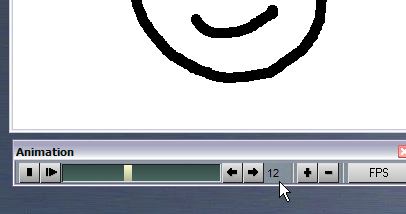 |
Note
your last frame number. In this example we drew 13 frames (#0 to
#12). There are a bunch more frames left, which are blank, since we
initially created an animation for 30 frames. |
|||||||||||
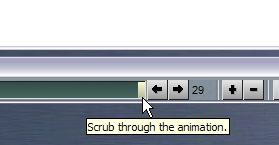 |
Scrub to the last frame |
|||||||||||
 |
Delete the unwanted frames, using the minus sign button [ - ] Repeat until to reach the frame you want to keep. |
|||||||||||
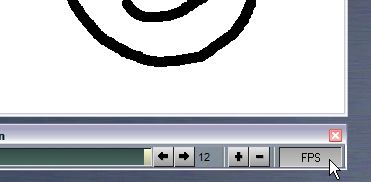 |
Change
playback speed and preview in realtime. You can playback the animation, and view it at various peeds. Click the FPS button (frames per second). |
|||||||||||
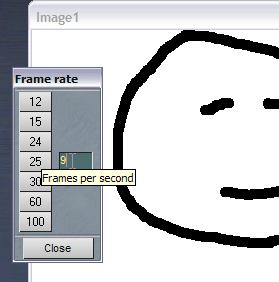 |
You
can pick amongst some preset speeds, or enter your own wanted playback
speed. This is for realtime viewing while inside Dogwaffle. When you save the image sequence it won't have timing info, just the images from the animationframes. |
|||||||||||
 |
Save often! If you haven't done so yet, you might want to save the current image sequence, so you have a copy of the originals, available to start something different from it, just in case. |
|||||||||||


| part 1 |
part
2 |
part 3 |
part 4 |
part 5 |